Do solar garden lights need direct sunlight to charge and work effectively
 FACEBOOK
 TWITTER
 LINKEDIN
If you are wondering whether your solar fixtures require a cloudless sky to function, the short answer is that while direct sun is the gold standard, it is not the only way they power up. Solar charging is the process by which the panels on your lights capture photons from any available light source to create electricity. While the intensity of the sun’s rays significantly dictates how quickly and deeply the internal batteries fill, solar technology has advanced to the point where they can still gather energy during indirect light conditions. However, your expectations for performance must match the reality of your yard’s specific exposure levels.
The amount of sunlight exposure your lights receive directly correlates to their nighttime output and duration. Direct rays provide the most efficient energy transfer, ensuring the battery capacity is fully utilized so your paths stay bright until dawn.
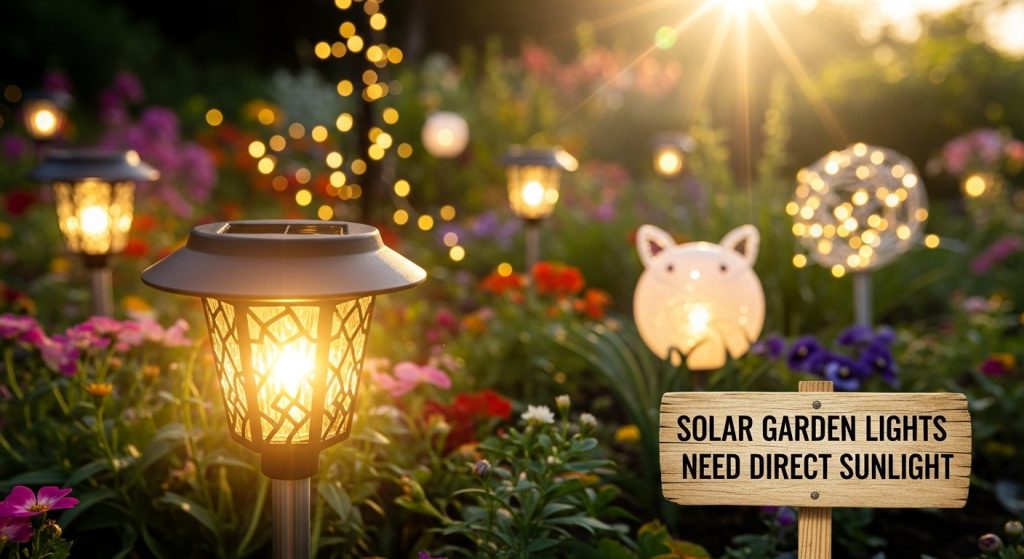
In contrast, lights placed in shaded areas or subjected to frequent cloudy weather may only reach a partial charge, resulting in a dimmer glow that fades shortly after midnight. To ensure your outdoor space remains safe and inviting, you should prioritize locations that see the most unobstructed sky. By understanding that light is the “fuel” for your system, you can make smarter placement decisions that balance your aesthetic goals with the practical need for a reliable power source.
What does it mean to “charge” a solar garden light
At the heart of every solar fixture are the solar panels, which act as a miniature power plant for your yard. When light hits the photovoltaic cells within these panels, it triggers a flow of electrons, creating an electrical current. This current is then directed into energy storage units, typically rechargeable lithium-ion or NiMH batteries, where it is held until a sensor detects that the sun has set. This cycle of gathering and storing is what we refer to as the “charge.”
These charging cycles are vital for maintaining the health of your lights. During the day, the system works quietly to fill the battery, ensuring there is enough “juice” to power the LEDs for several hours. Without this daily replenishment, the battery would soon be depleted, leaving your garden in the dark. The efficiency of this process depends on the quality of the panel and the intensity of the light it receives, making the charging phase the most important part of your lighting’s daily operation.
Why direct sunlight improves solar charging but isn’t always required
Direct sunlight is the most powerful energy source because it hits the panel with the highest concentration of photons. This high-intensity exposure allows the panel to generate a large amount of electricity in a short window of time. However, solar panels are sensitive to the entire spectrum of visible light, meaning they can still function in indirect light or under cloudy conditions. Even on an overcast day, enough light filters through the atmosphere to trigger a charge, though it happens at a much slower rate.
Think of it like a rain barrel: a heavy storm (direct sun) fills it up in minutes, while a light mist (indirect light) might take all day to achieve the same level. While your lights will still “work” without six hours of beaming sun, they will not reach their maximum potential. In shaded locations, the panels are essentially trying to sip energy from the shadows. Modern panels are getting better at capturing these lower light levels, but for the brightest and longest-lasting results, there is no true substitute for the raw power of unshaded sun.
How much sunlight is needed for consistent solar garden light performance
To achieve a reliable and bright output every night, most systems require between 6 and 8 sunlight hours of quality exposure. This duration is usually enough to top off the battery and provide a steady light for 8 to 10 hours after dusk. The total daily exposure is the primary factor that determines whether your lights will stay on until the early morning or shut off shortly after you go to bed.
You must also account for seasonal variation in your planning. In the winter, the sun is lower in the sky and the days are shorter, which naturally reduces the available charging time. This is often when homeowners notice their solar lights performing poorly. To compensate for these darker months, you should place your lights in the sunniest possible spots. Ensuring the panels are clean and clear of snow or fallen leaves is also essential, as any physical barrier can significantly cut down on the amount of energy the system can capture from the limited winter sun.
How placement height and angle influence solar charging efficiency
The panel positioning is a subtle but critical detail that many people overlook. In a garden, the sun angle changes throughout the day, moving from east to west. If your light is tucked right against the north side of a tall fence or a building, it may only receive a small window of direct light. Choosing locations that have a clear view of both the morning and afternoon sky will maximize the total energy collected, ensuring a much deeper charge for the battery.
Your height influence also matters. Placing a light higher up, such as on a 3-meter pole, often clears the “shadow line” created by low-growing shrubs or garden furniture. This gives the panel a more consistent path to the sun’s rays. Some high-end solar fixtures even allow you to tilt the panel to match the specific latitude of your home, ensuring the light hits the cells at a 90-degree angle for maximum efficiency. By thinking about the geometry of your yard and the path of the sun, you can significantly boost the reliability of your system without changing a single fixture.
What happens when solar lights are installed in shaded or low-sun areas
When a fixture suffers from a significant shade impact, the most immediate result is a reduced battery drain threshold. Because the battery never reaches a full charge during the day, it runs out of power much faster at night. You might notice that while your sun-drenched lights are still glowing at midnight, the ones in the shade have already flickered out. This lack of lighting reliability can be a major issue if you are relying on those lights for safety on a set of stairs or a dark path.
In extreme cases of low-sun exposure, the battery may fall into a state of “deep discharge,” where it no longer has enough energy to trigger the light sensor. Over time, this can actually damage the battery’s ability to hold a charge at all, shortening the overall life of the fixture. If you must place a light in a dim area, you should look for “remote panel” options where the light sits in the shade but the panel is connected by a wire to a sunny spot nearby. This allows you to have the aesthetic of the shaded light without sacrificing the power needed to make it work.
How to plan placement so solar lights charge reliably in real gardens
A successful placement strategy starts with a simple “sun mapping” exercise. Spend a Saturday observing your yard at 9:00 AM, 12:00 PM, and 4:00 PM. Mark the areas that stay in the sun for at least two of those checks; these are your high-performance zones. By mapping these patterns, you can avoid the frustration of installing lights in areas that look bright at noon but are in total shadow for the rest of the day.
Your performance planning should also account for future growth. A small sapling planted today might become a massive, light-blocking canopy in three years. When you choose your spots, look for unobstructed areas like the edges of driveways, open lawn borders, or the tops of pillars. Balancing the look of the garden with the physics of solar energy is the key. Sometimes, moving a light just two feet to the left can be the difference between a light that works for two hours and one that works for ten.
What common mistakes reduce solar garden light charging effectiveness
The most frequent installation errors involve placing panels directly under a porch overhang or a dense tree canopy. People often assume that “outdoor light” is enough, but as we’ve seen, the performance loss from even partial shade is significant. Another common blunder is ignoring the tilt of the panel; if the panel is facing away from the equator, it will miss out on the most intense rays of the day, leading to a chronically undercharged battery.
Planning problems also arise when homeowners underestimate the impact of seasonal shadows. A spot that is perfectly sunny in July might be in total darkness in December because of the sun’s lower arc. To avoid these blunders, you should aim for the most “open” spots in your yard. Additionally, many people forget to clean their panels. A thin layer of dust or pollen can act like a shade cloth, reflecting the light away from the cells. A quick wipe with a damp cloth every few months is often all it takes to keep your lights performing like new.
What reviewers should check before finalizing solar garden light placement
Before you commit to a final layout, a thorough site assessment is necessary to ensure your performance criteria are met. This final check helps you avoid the “install and regret” cycle by catching potential issues before the first hole is dug. By verifying the light patterns and the needs of your space, you can set up a system that is as reliable as it is beautiful.
- Sun Tracking: Does the location receive at least 6 hours of unshaded light?
- Obstruction Mapping: Are there any eaves, fences, or trees that will block the sun?
- Purpose Check: Is the light for safety (needs high sun) or just a soft accent (can handle partial shade)?
- Seasonal Forecast: Will the sun’s path in the winter still reach this spot?
- Panel Tilt: Is the panel oriented toward the south (in the northern hemisphere) for maximum capture?
- Battery Match: Does the battery capacity allow for a “reserve” charge during cloudy spells?
- Maintenance Path: Is the panel easy to reach for occasional cleaning?
What garden post top landscape lighting systems are used in outdoor spaces
Garden post top landscape lighting refers to the category of fixtures designed to sit on vertical posts. These post top fixtures are the primary choice for area-wide outdoor lighting because they provide a 360-degree glow. When choosing solar versions of these lights, the placement of the pole becomes the most important factor, as the height of the post can help the panel clear low-level garden shadows.
How do solar landscape lamp posts operate without wiring
A Solar landscape lamp post is a self-contained unit that offers complete power autonomy. Because they do not require any underground cables, you have the freedom to place them in the middle of a finished lawn or at the end of a long driveway. They are a fantastic, eco-aware way to add permanent lighting to your property without the cost and mess of a major construction project.
How do aluminum 3M and 4M garden lights relate to solar placement planning
When planning with Aluminum 3m 4m garden light poles, the post height works in your favor for sun exposure. At 3 or 4 meters high, the solar panels are much more likely to stay above the “shade line” of your home’s fences and shrubs. This elevated position ensures a more consistent charge, making taller aluminum posts a smart choice for maintaining high performance in complex landscapes.
How should lamp post height influence performance and sunlight exposure
Following a Garden lamp post height guide is essential for successful height planning. Higher poles provide a better “view” of the sky, which maximizes light exposure for the solar panels. This ensures that the fixture captures as much energy as possible, even in yards with many trees, keeping your pathways bright and safe through the entire night.
Why color temperature matters for solar garden lighting ambiance
Choosing the right Garden lights color temperature is about achieving visual comfort and the right mood. While color temperature does not affect how the light charges, it completely changes how your garden looks. Warmer tones are almost always preferred for residential spaces, as they create a welcoming and cozy atmosphere that makes the outdoors feel like a true extension of your home.


- 10 Meters Lamp Post
- 10 Meters Pole
- 1000w Led Projector
- 100W LED Tunnel Light
- 12 Meters Lamp Post
- 12 Meters Pole
- 1200w Led Projector
- 15 Light Pole
- 1500w Led Projector
- 150W LED Tunnel Light
- 1800w Led Projector
- 2 In 1 Solar Flood Light
- 200w Led Tunnel Light
- 50w Led Tunnel Light
- 6 Meters Lamp Post
- 6 Meters Pole
- 8 Meters Lamp Post
- 8 Meters Pole
- 800w Led Projector
- 80w Led Tunnel Light
- Colourful Decorative Light
- Conical post
- Courtyard Lamp
- courtyard light
- courtyard lighting fixture
- Decorative Landscape Light
- Decorative road Light
- Flood Light For Courtyard
- Flood Light for Garden
- Flood Light For Outdoor
- Foot Led High Bay Lights
- high bay led lights 100w
- industrial lampshade
- industrial LED shed lights
- industrial magnifying glass with light
- Integrated Solar Flood Light
- led courtyard lamp
- led courtyard light
- led high bay light 100w
- LED Projector For Stadium
- Led UFO High Bay 150W 5000k
- Lighting Plants Mining Price
- Maintenance Free LED Street Light
- Pic Controlling Tunnel Light
- PLC controlling tunnel light
- Post Top Garden Light
- RGB Landscape Light
- Rgbw Decorative Light
- Smart Tunnel Light
- solar courtyard lamp
- solar courtyard light
- Solar LED Road Light
- Solar Street Light For 10 Meter Pole
- Solar Street Light For 12 Meter Pole
- Solar Street Light For 6 Meter Pole
- Solar Street Light For 8 Meter Pole
- Split Type Solar Flood Light
- Sporting Projector
- Stadium Led Projector
- Street Lighting Post