
 Request A Quote

Industrial High Bay LED Lights Guide: Lumens, Watts, And Glare
 FACEBOOK
 TWITTER
 LINKEDIN
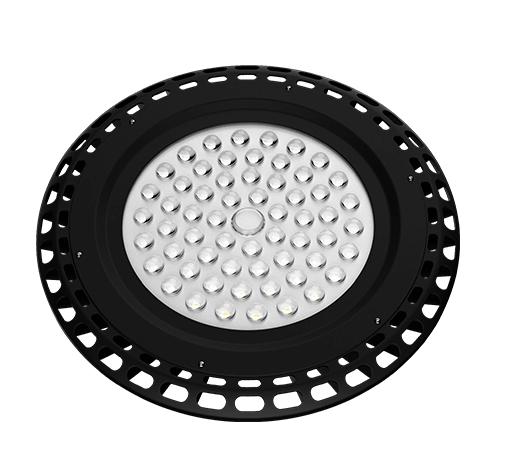
Industrial High Bay LED Lights are usually bought for one goal—bright, efficient lighting from a high ceiling—but new buyers often discover that “more lumens” is not the same as “better visibility.” Dawn Lighting helps factories, warehouses, and workshops avoid the most common mistake: selecting fixtures by watts alone, then dealing with glare, uneven light, and worker complaints after installation. This guide explains the practical link between lumens, watts, and glare, in the same order we use to educate first-time buyers.
1) Start With the Task: What Needs to Be Seen Clearly
Before you compare Industrial High Bay LED Lights specs, define the visual task. A packaging line needs different light than a racking aisle, and both are different from a maintenance bay. If you skip this step, you will overbuy power or underbuy optical control.
Focus on three questions:
✓ What is the mounting height? Common high-bay installs are roughly 6–14 meters (20–45 ft).
✓ What is the target area? Open floor, narrow aisles, or mixed zones.
✓ What is the surface like? Polished concrete, stainless equipment, and glossy packaging can amplify glare.
A simple buyer habit helps: walk the space and mark “high attention” zones—inspection benches, label reading points, forklift intersections, and machine controls. Those are the places where glare becomes a safety issue, not just an annoyance.
2) Lumens Vs Watts: Efficiency Is the Hidden Variable
Many buyers still treat watts as “brightness.” In LED lighting, watts are only power draw. Brightness is driven by lumens, and the bridge between them is luminous efficacy (lm/W)—how efficiently the fixture turns electricity into light.
Modern Industrial High Bay LED Lights often land in a practical efficacy band of about 130–190 lm/W, depending on LED package, driver design, heat management, and optics. That means the same lumen output can come from different wattages.
Here is the logic you can reuse:
✓ Lumens = delivered light output (what you receive)
✓ Watts = energy consumed (what you pay for)
✓ lm/W = efficiency (how good the conversion is)
What this means for new buyers: If two fixtures claim similar lumens, the lower-watt option may save energy—but only if the optical design, thermal stability, and driver quality hold up over time. A cheap fixture can look bright on day one and drift down quickly if heat is not controlled. At Dawn Lighting, we encourage buyers to treat lm/W as a starting point, then verify optical distribution and glare control before you decide.
3) The Real Reason “Too Bright“ Complaints Happen: Glare
Glare is not simply high brightness. Glare happens when brightness hits the eye at the wrong angle, or when a bright source sits in a worker’s direct field of view. In high-bay spaces, glare is often triggered by three patterns:
✓ Narrow beam optics installed too low (hot spots and harsh reflections)
✓ Overlighting shiny surfaces (floor glare, machine glare, packaging glare)
✓ Improper spacing (bright islands with dark gaps, causing eye fatigue)
How Optics and Beam Angle Change Glare
Beam angle is one of the most practical tools you control. Many Industrial High Bay LED Lights are offered with common distributions like 60° / 90° / 120°, plus dedicated aisle optics for racks.
• 60°: Useful for higher ceilings or focused zones, but can create strong brightness peaks if spacing is not correct.
• 90°: A balanced option for many open areas—better uniformity with controlled intensity.
• 120°: Wider spread for lower high-bay heights, often softer on glare but can waste light if ceilings are very high.
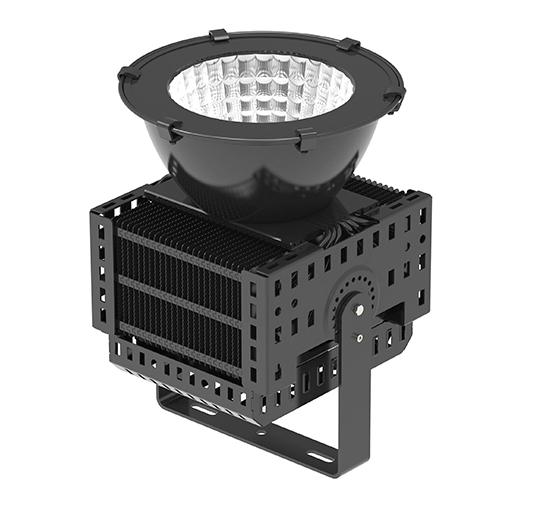
If your workers look up frequently (crane operation, overhead picking, tall racks), glare control is not optional. Look for fixtures that use deeper reflectors, optical lenses designed to reduce high-angle brightness, or diffusers engineered for uniformity—not just a frosted cover that steals efficiency.
4) A Practical Way to Choose: Lumens Per Zone, Not One Number for All
New buyers often want a single lumen target for the whole building. In real facilities, the best result comes from zoning: you assign lumen density by task, then choose optics to keep light on the work plane—not in eyes.
A simple zoning approach:
✓ Open production floor: prioritize uniformity and comfortable brightness
✓ Racking aisles: prioritize vertical illumination and aisle optics
✓ Inspection / QC areas: prioritize clarity and consistency, avoid glare on glossy parts
✓ Loading docks: prioritize instant-on reliability and durability
At Dawn Lighting, we often see better outcomes when buyers accept a mixed layout—different beam angles or different wattage classes in different zones—rather than forcing one fixture everywhere. This reduces both glare and wasted lumens.
Also consider controls early. A high bay with 0–10V dimming can be tuned after installation, which is a practical safety net when the real-world reflectivity of floors, racks, and equipment surprises you.
5) Specs That Matter in the Field: What to Check Beyond Brightness
Industrial High Bay LED Lights live in heat, dust, vibration, and long operating hours. If you only compare lumens and watts, you will miss the specs that drive reliability and comfort.
Here are the field-check items we recommend new buyers prioritize:
✓ Input voltage range: Many industrial sites use 100–277V (some need higher). Match your electrical reality.
✓ Ingress protection: For dusty or washdown-prone areas, IP65 is a common baseline target.
✓ Impact resistance: In forklift zones, look for robust housings (often IK-rated designs are used).
✓ Flicker performance: Low flicker reduces fatigue for long shifts and helps with cameras and inspection systems.
✓ Thermal design: Heat sinking and driver placement affect lumen maintenance and lifespan.
If your facility uses vision systems, barcode scanning, or quality cameras, lighting stability becomes part of your production process. Stable drivers and consistent output matter as much as headline lumens.
6) A Simple Buyer Checklist and a Clear Next Step
If you want a fast, low-risk path as a new buyer, follow this sequence. It keeps decisions logical and prevents the “installed it, now we regret it” cycle.
✓ Measure mounting height and map zones (open floor, aisles, inspection)
✓ Choose lumen targets per zone, then select optics to match the geometry
✓ Compare efficiency (lm/W) and optical distribution, not watts alone
✓ Add glare control features where workers have upward sightlines
✓ Confirm industrial durability (voltage, IP rating, impact resistance, flicker, thermal design)
✓ Plan for tuning (dimming or controls) so you can optimize after installation
CTA (Dawn Lighting): If you share your ceiling height, layout (open vs aisle), and your key work tasks, Dawn Lighting can recommend a practical Industrial High Bay LED Lights plan—beam angles, spacing logic, and wattage classes—designed to hit brightness goals without creating harsh glare. Send us a simple floor sketch and a few photos of reflective surfaces, and we’ll help you turn “spec sheets” into a lighting layout that actually works on the floor.
- 10 Meters Lamp Post
- 10 Meters Pole
- 1000w Led Projector
- 100W LED Tunnel Light
- 12 Meters Lamp Post
- 12 Meters Pole
- 1200w Led Projector
- 15 Light Pole
- 1500w Led Projector
- 150W LED Tunnel Light
- 1800w Led Projector
- 2 In 1 Solar Flood Light
- 200w Led Tunnel Light
- 50w Led Tunnel Light
- 6 Meters Lamp Post
- 6 Meters Pole
- 8 Meters Lamp Post
- 8 Meters Pole
- 800w Led Projector
- 80w Led Tunnel Light
- Colourful Decorative Light
- Conical post
- Courtyard Lamp
- courtyard light
- courtyard lighting fixture
- Decorative Landscape Light
- Decorative road Light
- Flood Light For Courtyard
- Flood Light for Garden
- Flood Light For Outdoor
- Foot Led High Bay Lights
- high bay led lights 100w
- industrial lampshade
- industrial LED shed lights
- industrial magnifying glass with light
- Integrated Solar Flood Light
- led courtyard lamp
- led courtyard light
- led high bay light 100w
- LED Projector For Stadium
- Led UFO High Bay 150W 5000k
- Lighting Plants Mining Price
- Maintenance Free LED Street Light
- Pic Controlling Tunnel Light
- PLC controlling tunnel light
- Post Top Garden Light
- RGB Landscape Light
- Rgbw Decorative Light
- Smart Tunnel Light
- solar courtyard lamp
- solar courtyard light
- Solar LED Road Light
- Solar Street Light For 10 Meter Pole
- Solar Street Light For 12 Meter Pole
- Solar Street Light For 6 Meter Pole
- Solar Street Light For 8 Meter Pole
- Split Type Solar Flood Light
- Sporting Projector
- Stadium Led Projector
- Street Lighting Post
