outdoor lighting installation
 FACEBOOK
 TWITTER
 LINKEDIN
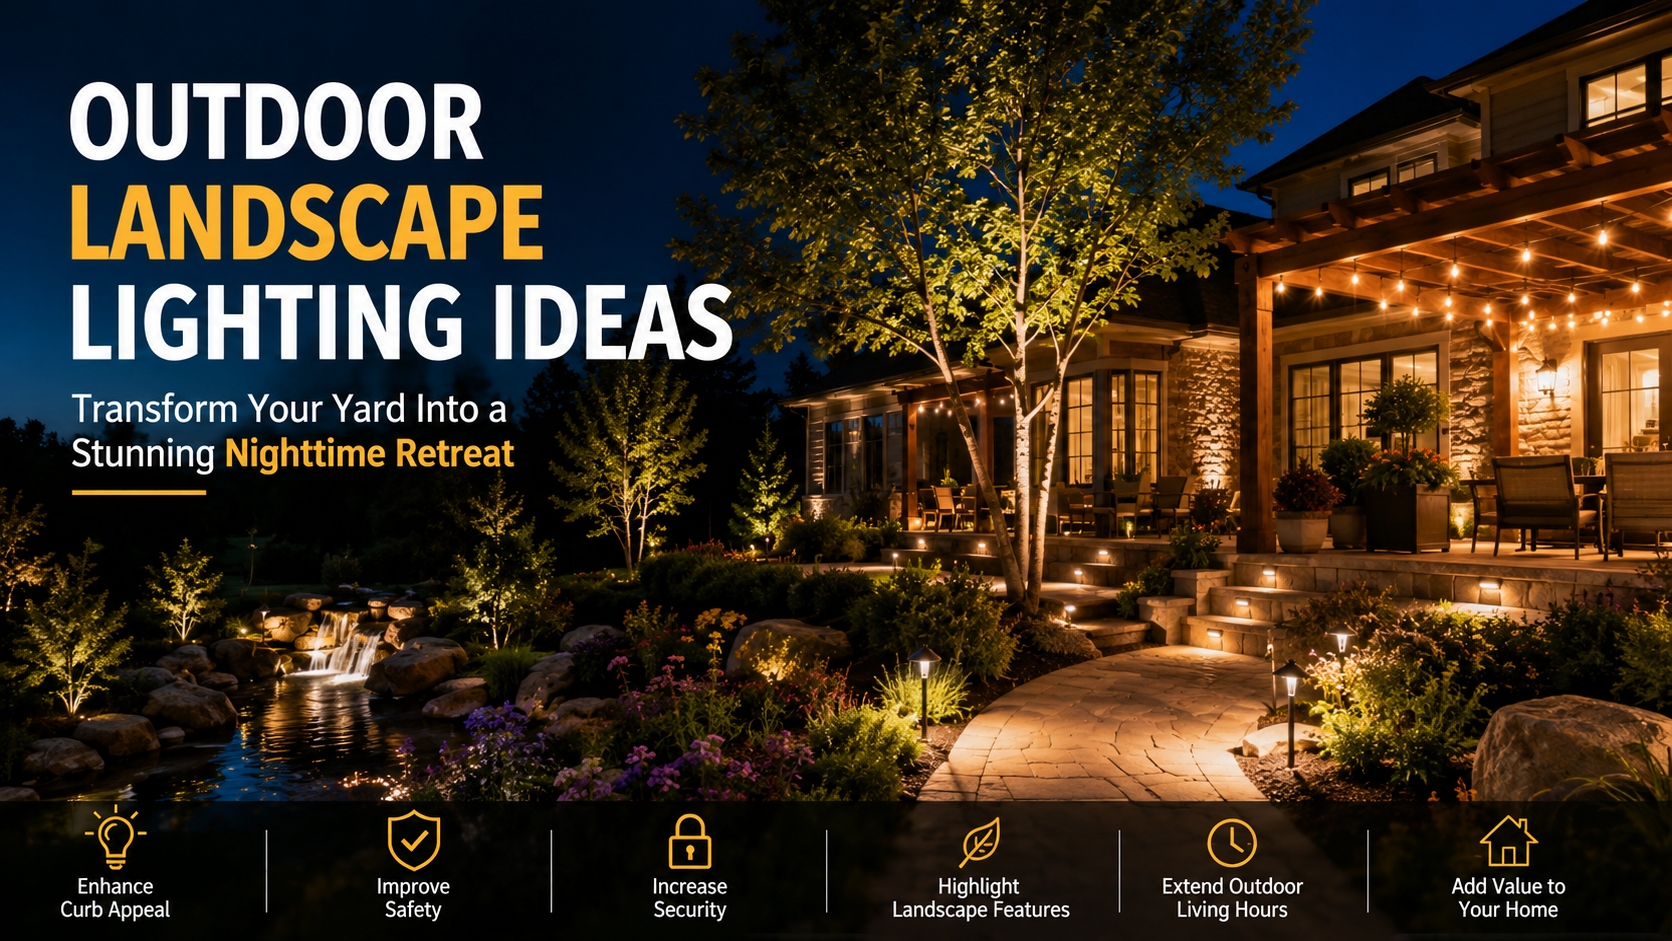
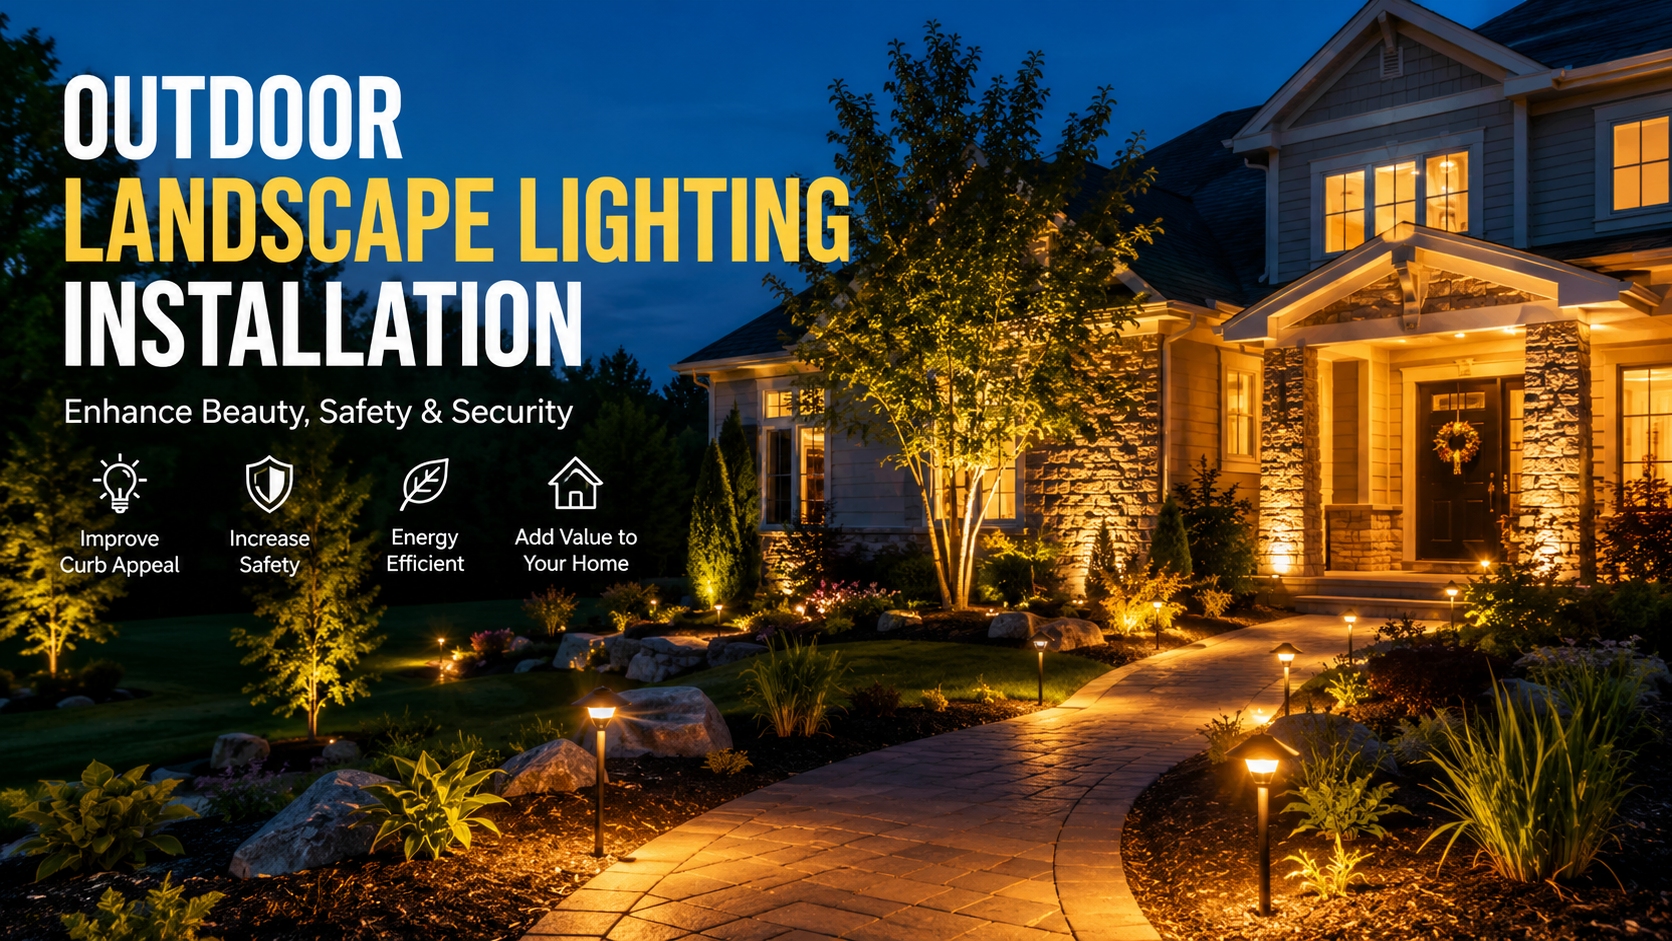
Installing outdoor landscape lighting is one of the best ways to make your property more beautiful, safe and functional. An effective lighting system can help to accentuate building design, light up walkways, improve security and provide a pleasant atmosphere for family and guests. Good landscape lighting can provide lasting value, whether you’re looking to enhance your home’s curb appeal or to make your outdoor rooms more functional after dark.

This is a complete guide to outdoor landscape lighting installation that features planning, fixture selection, wiring, installation steps and tips for maintenance.
Why Outdoor Landscape Lighting Matters
Many homeowners spend a considerable amount of money on landscaping and then don’t use it at night. Outdoor lighting can help make your yard usable longer and enhance your visibility and security. Lights, when positioned appropriately can:
- Increase nighttime safety on walkways and stairs
- Enhance home security by reducing dark areas
- Showcase trees, gardens, and architectural details
- Improve curb appeal and property value
- Create a comfortable outdoor ambiance for entertaining
Modern LED landscape lighting systems use energy efficiently, last long and create priceless lighting effects with very little maintenance. Experts also suggest a combination of layered lighting with ambient, task and accent lights for optimum results.
Planning Your Landscape Lighting Design
The first step to a successful outdoor landscape lighting project is planning. Prior to buying fixtures or digging trenches, assess your property and set goals.
Identify Key Areas to Illuminate
Focus on areas that provide the greatest impact:
- Front entrances
- Walkways and pathways
- Driveways
- Patios and decks
- Garden beds
- Trees and shrubs
- Water features
- Architectural elements
Walk around your property at dusk to identify dark spots and focal points that would benefit from lighting.
Create a Lighting Layout
Sketch a simple site plan showing:
- Fixture locations
- Transformer position
- Cable routes
- Power source locations
A detailed layout will help ensure the fixtures are not bought needlessly for not being needed in a balanced manner. Professional installers recommend to plan the whole system before installation.
Types of Landscape Lighting Fixtures
Selecting the right fixtures is essential for achieving the desired effect.
Path Lights
Path lights are ideal for:
- Walkways
- Garden paths
- Driveways
- Flower bed borders
These fixtures improve safety while creating a warm and inviting appearance.
Spotlights
Spotlights provide focused beams of light that can highlight:
- Trees
- Sculptures
- Architectural details
- Flags
They are commonly used for uplighting and accent lighting.
Flood Lights
Flood lights produce wider beams and are suitable for:
- Large landscape areas
- Security lighting
- Exterior walls
- Driveways
Deck and Step Lights
These fixtures improve visibility and safety on:
- Decks
- Stairs
- Retaining walls
- Outdoor seating areas
Well Lights
Installed flush with the ground, well lights are excellent for dramatic uplighting effects on trees, columns, and walls.
Choosing Between Low-Voltage and Line-Voltage Systems
Most residential outdoor landscape lighting installations use low-voltage systems.
Low-Voltage Lighting
Benefits include:
- Safer operation
- Easier installation
- Lower energy consumption
- Flexible fixture placement
- Lower installation costs
A transformer is used to take household 120 volt power and make a safer 12 volt power supply. This method is popular in do-it-yourself projects and in the home.
Line-Voltage Lighting
Line-voltage systems are typically used for:
- Large commercial properties
- High-output lighting requirements
- Specialized applications
Because they involve direct household voltage, professional installation is often required.
Essential Components of a Landscape Lighting System
A complete outdoor lighting system typically includes:
Transformer
The transformer is the main component of the system, which is used to transform the normal household electricity into low voltage electricity. For future expansion, it is recommended to use a transformer that is larger than necessary.
Low-Voltage Cable
Cable rated for the outdoors is used to connect the transformer to all the fixtures. This helps to reduce voltage drop and maintain steady bright levels by using the correct sized cable.
Lighting Fixtures
Choose weather-resistant fixtures made from:
- Brass
- Copper
- Stainless steel
- Powder-coated aluminum
These materials provide excellent durability and corrosion resistance.
Timers and Smart Controls
Modern systems often include:
- Photocells
- Digital timers
- Smart home integration
- Wi-Fi controls
- Motion sensors
Automation improves convenience and energy efficiency.
Step-by-Step Outdoor Landscape Lighting Installation
Step 1: Install the Transformer
Mount the transformer near an outdoor GFCI-protected outlet.
Best practices include:
- Mounting at least 12 inches above ground level
- Protecting it from standing water
- Providing easy access for maintenance
The transformer should be installed before running any wiring.
Step 2: Lay Out Fixtures
Position all fixtures according to your lighting plan.
Before making permanent installations:
- Test spacing
- Check beam angles
- Verify coverage areas
Temporary placement allows adjustments before wiring is finalized.
Step 3: Run Low-Voltage Cable
Starting from the transformer:
- Route cable to each fixture location
- Follow garden edges and landscape borders
- Avoid high-traffic areas when possible
Most installations require only shallow trenches several inches deep to conceal and protect wiring.
Step 4: Connect Fixtures
Most modern landscape lighting systems feature quick-connect connectors that simplify installation.
When connecting fixtures:
- Turn off power at the transformer
- Follow manufacturer instructions
- Verify secure wire connections
- Protect exposed connections from moisture
Step 5: Test the System
Once all fixtures are connected:
- Restore power
- Check each light
- Confirm consistent brightness
- Troubleshoot any non-functioning fixtures
Poor cable connections are among the most common causes of lighting issues.
Step 6: Make Nighttime Adjustments
After sunset:
- Adjust fixture angles
- Fine-tune beam placement
- Reduce glare
- Balance brightness levels
Small positioning changes can significantly improve overall visual impact.
Common Landscape Lighting Techniques
Professional designers use several proven lighting methods.
Uplighting
Lights shine upward to emphasize:
- Trees
- Columns
- Architectural details
Downlighting
Fixtures mounted above cast light downward, creating a natural moonlight effect.
Grazing
Lighting placed close to textured surfaces highlights:
- Stone walls
- Brick facades
- Decorative masonry
Silhouetting
Objects are placed between the light source and a wall, creating dramatic shadow effects.
Layered Lighting
Combining ambient, task, and accent lighting creates depth and visual interest while avoiding harsh or overly bright installations.
Common Installation Mistakes to Avoid
Avoid these frequent errors:
- Over-lighting the landscape
- Using inconsistent color temperatures
- Ignoring glare control
- Poor cable routing
- Undersized transformers
- Failing to plan future expansion
Experts recommend warm color temperatures between 2700K and 3000K for most residential applications because they create a welcoming and natural appearance.
Maintaining Your Landscape Lighting System
Routine maintenance ensures optimal performance.
Regular Cleaning
Clean lenses periodically to remove:
- Dirt
- Dust
- Leaves
- Debris
Inspect Wiring
Check for:
- Damaged cables
- Loose connections
- Corrosion
Adjust Fixtures
Over time plants and landscaping change. Implement the necessary repositioning of fixtures to achieve desired lighting effects as needed.
Replace Components
LED fixtures will generally last many years, but from time to time, connectors, timers or transformers may need to be replaced.
Conclusion
The installation of outdoor landscape lighting is a savvy investment that can add to the beauty, safety and functionality of your property. With thoughtful design, premium fixtures, and installation procedures, you can design an outside space that’s both beautiful and functional well after dark.
You can either install it yourself or have it professionally installed, but a good low voltage led lighting system can make your home look great at night, provide extra security, and enhance your home’s curb appeal for years to come.

- 10 Meters Lamp Post
- 10 Meters Pole
- 1000w Led Projector
- 100W LED Tunnel Light
- 12 Meters Lamp Post
- 12 Meters Pole
- 1200w Led Projector
- 15 Light Pole
- 1500w Led Projector
- 150W LED Tunnel Light
- 1800w Led Projector
- 2 In 1 Solar Flood Light
- 200w Led Tunnel Light
- 50w Led Tunnel Light
- 6 Meters Lamp Post
- 6 Meters Pole
- 8 Meters Lamp Post
- 8 Meters Pole
- 800w Led Projector
- 80w Led Tunnel Light
- Colourful Decorative Light
- Conical post
- Courtyard Lamp
- courtyard light
- courtyard lighting fixture
- Decorative Landscape Light
- Decorative road Light
- Flood Light For Courtyard
- Flood Light for Garden
- Flood Light For Outdoor
- Foot Led High Bay Lights
- high bay led lights 100w
- industrial lampshade
- industrial LED shed lights
- industrial magnifying glass with light
- Integrated Solar Flood Light
- led courtyard lamp
- led courtyard light
- led high bay light 100w
- LED Projector For Stadium
- Led UFO High Bay 150W 5000k
- Lighting Plants Mining Price
- Maintenance Free LED Street Light
- Pic Controlling Tunnel Light
- PLC controlling tunnel light
- Post Top Garden Light
- RGB Landscape Light
- Rgbw Decorative Light
- Smart Tunnel Light
- solar courtyard lamp
- solar courtyard light
- Solar LED Road Light
- Solar Street Light For 10 Meter Pole
- Solar Street Light For 12 Meter Pole
- Solar Street Light For 6 Meter Pole
- Solar Street Light For 8 Meter Pole
- Split Type Solar Flood Light
- Sporting Projector
- Stadium Led Projector
- Street Lighting Post