
 Request A Quote

Solar Street Light: Road Width, Pole Height and Winter Storage
 FACEBOOK
 TWITTER
 LINKEDIN
The solar street lighting system can only be successful if the road need, pole placement, and off-grid energy system are well suited to each other. When considering project, buyers start with the wattage, but mostly, results on the field are defined by road width, mounting level, sun resource in the region, storage margin in winter, optical distribution and access to maintenance.
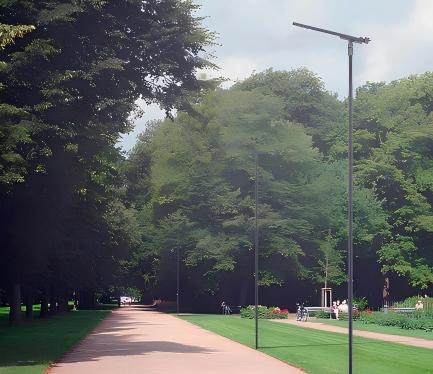
Thus, designing a practical solar street lighting system should be done from the application backwards. Simple questions first: what is the width of the road, how long is the winter night, what is the necessary lighting level, how many cloudy days must be able to be serviced, and how easy is it to service the panel and battery?
With these inputs confirmed, the project can be a fit to the LED solar street light range available, rather than choosing a fixture with rated watts only.
Begins with Road Width and Pole height
The light distribution requirements are different for a residential lane, a village road, a campus path and a industrial access road. Prior to comparison, check the width of the road, bends, junctions, pedestrian activity and target pole height.
A narrow road might be able to operate at a lower mounting height and spacing. A higher pole is needed if a wider carriageway, and a longer arm and a beam that is useful light further across the carriageway.
It’s not a matter of so many watts on the product. It is the amount of light that reaches the roadway that is useful. If the beam is too narrow, there will be gaps, and if it’s too wide, then energy is wasted in areas beyond the target zone.
Intersections, pedestrian crossings or mixed vehicle and pedestrian areas should be checked against local roadway-lighting requirements prior to equipment selection.
Match Optical Distribution prior to setting Pole Spacing.
Optics have an impact on lighting quality and on the energy consumption per night. The pole spacing should be determined on the photometric layout and not set according to a spacing rule from another street.
The mounting height, arm length, road width and beam pattern should all be considered in conjunction. Even forward coverage is typical along straight roads and a different distribution might be required at bends, entrances and crossings.
Once installed, check the roadway from the driver and pedestrian points of view. Increased lumen output will not compensate for a poor beam pattern and glare or backlight will waste battery output without gaining better visibility of the road.
Design System for the weakest winter conditions
The solar panel and battery should be chosen based on the least favorable season, NOT the sunniest week. The conditions which reveal an undersized system are short winter days, long nights and several successive cloudy days.
Peak sun hours for the weakest month, the longest winter night, the number of hours the system is to be used each night, the reserve hours for consecutive cloudy days and the expected system losses are all considered design inputs.
While a project proposal can be appealing to operate at full brightness all night, it could be difficult to maintain that level of stability during the winter months. A timed schedule can help to maintain higher levels of output in the morning peak hours of traffic and lower output during periods of low traffic.
With no on-site data, the wattage of the panels and the capacity of the battery is merely estimated. The following table shows the minimum information required prior to final system selection and quotation.
| Item | Project Data |
| 1. Site & Road Type | Country/city: per client project; road type: ☑ Municipal road ☑ Residential road ☑ Industrial park ☑ Rural road ☑ Parking lot □ Other. |
| 2. Road & Lighting | Road width: project value, m; lanes: project value; intersections/curves/pedestrian areas: verify on site; target illuminance: local standard and lighting design. |
| 3. Pole & Layout | Pole height: project value, m; spacing: project value, m; layout: ☑ Single-side ☑ Both sides ☑ Staggered; arm length: by project. |
| 4. Winter Sun | Lowest-sun month: by site; peak sun hours: local weather data, h; longest winter night: by site, h. |
| 5. Storage & Autonomy | Rainy/cloudy autonomy: 5–7 days; daily operating hours: by project; all-night winter operation: confirm by project. |
| 6. Dimming & Service | Schedule/brightness: time-based dimming, project settings; sensing/remote monitoring: optional; maintenance method/interval: contract and project plan. |
Select between All-in-One or Split Structure by Site Conditions.
The all in one solar street light is simple to install and is ideal for pathways, residential streets and smaller roads where a smaller size and design is desired.
A split solar street light allows for greater flexibility when it comes to the orientation of the panels, battery size and access to the batteries for maintenance. It is more appropriate when the direction of the luminaire and solar plate are different.
There is no rule that one is necessarily better. This depends on the width of the road, the space available for mounting, the winter energy demand, wind load, risk of vandalism and maintenance plan.
For those projects that require more flexibility than a fully integrated solar street light but less hassle than a fully integrated semi-integrated solar street light can be used.
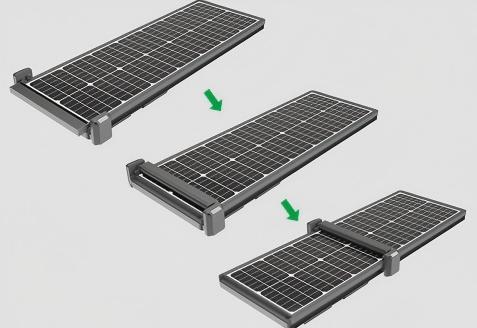
Cover the Solar Panel Charging Window to keep it safe.
The panel needs to be exposed to useful sunlight for sufficient periods of time each day. Even if a panel can be seen from the ground, a significant amount of charging time can be lost due to nearby shade.
Shadows may fall on part of the luminaire, tree, building, signs and cables. Check the solar trajectory in the lowest season as the sun’s angle in the sky and vegetation may alter the shading effect.
Consider the orientation of the panels for the project site and the ability to clean them. In snow prone areas, tilt and orientation will also impact the shedding of snow and the rate of charging restart.
Even if the panel size is increased, poor panel installation location cannot be solved. A smaller unshaded panel may be more efficient than a larger panel, part of which is shaded for part of the charging time.
As a Replaceable Energy Reserve, the Battery is subject to the following conditions.
The battery is charged and discharged daily, experiences varying operating temperatures and slowly experiences a reduction in useable capacity. It should be based on a working size for the winter reserve, not a brochure figure.
The enclosure should prevent water from entering, excessive heat and loose connections from being formed, and unauthorized access from being made while at the same time allowing technicians to safely inspect or replace the battery.
The lighting plan needs to consider some battery ageing. Note the battery type, installation date, and controller settings and track condition checks and replacement dates, to distinguish fault from normal capacity loss.
Plan Access for Outdoor Protection and Maintenance
A solar street light is an outdoor power system, it is not only a luminaire. The maintenance area shall include the panel, the bracket, the battery compartment, the housing of the controller, connectors, the openings of the sensors and cable entries.
The IP rating is for the tested enclosure configuration. Later changes, such as adding cable glands or connectors must not reduce the degree of protection that is anticipated for the installed system.
Drainage, condensation, corrosion protection, UV exposure, dust and cleaning access are all important factors to be considered concurrently. Dust and vegetation can potentially cause a loss of solar charging before an electrical component fails.
Pole and foundation design shall consider: pole height, panel area, luminaire weight, wind loading, anchor bolts, soil conditions and corrosion protection. The bigger the panel, the wind load it will generate.
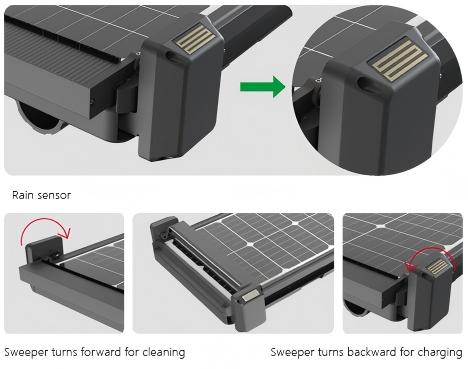
Don’t Hide Undersizing; Use Controls to Manage Energy.
Control can consist of dusk to dawn operation, timed dimming and movement activated boost lighting. Solar Street Light with integrated sensor could be helpful in the streets where there is not traffic all the time.
For roads with light traffic, reduced base output and temporary higher output will save energy. Constantly busy streets may require an unvarying lighting level, rather than switching.
The operating schedule should specify how bright it should be during each time period and what actions should be taken after a pedestrian or vehicle is detected.
Controls to be prolonged over the reserve of a panel of proper size and battery. They should not be employed to camouflage a system that can’t provide winter energy needs.
The objective here is to commission the System Across Several Nights.
Don’t just turn the light on and off; commissioning should be more than that. Before sunrise, check panel charging, battery response, light distribution and controller timing and reserve.
Monitor the system following cloudy weather and see if it reverts to the normal schedule. Check the cleanliness of panels, the new shading, cable entries and fault / low energy logs.
It is also important to review the project seasonally as a summer schedule may not work with longer winter nights or lower input of solar energy during the day.
Conclusion
The key features for a reliable solar street light project are the road width, pole height, sun resource of location, winter storage margin, optical distribution and maintenance access.
Specifics like high power or all night operation should not be used to select a structure, battery reserve, and control schedule, but rather a description of the structure to be used at the site.
The system with the biggest wattage doesn’t necessarily mean it’s the best. This is the system that remains to this day the source of valuable light on the road during the winter nights, periods of cloud and normal ageing of the components.
FAQs
Q1. What information is needed prior to choosing a solar street light?
Make sure the road width, pole height, pole spacing, sun information for the weakest month, hours of operation at night, and reserve for cloudy days and desired lighting level are confirmed.
Q2. Do solar street lights always make sense as an ‘all-in-one’ solution?
No. It is easy to install, however, a split system might be easier in terms of flexible orientation of the panels, battery storage or access to components for the project.
Q3. Why is it that some solar street lights turn off before the morning in winter?
Typical reasons include poor winter charging, battery depletion, shading, battery aging or a lighting design that uses more power than can be provided to the site.
Q4. What are the key issues for optical distribution in road lighting?
It is critical. The correct beam allows for better road coverage and uniformity, less glare, less back light and less battery usage.
Q5. What are some of the things that should be taken care of in routine maintenance?
Inspect Cleanliness of Panels, New Shading, Battery, Controller Records, Connectors, Cable Entry, Pole Stability, Optical Alignment and the programmed lighting schedule.

- 10 Meters Lamp Post
- 10 Meters Pole
- 1000w Led Projector
- 100W LED Tunnel Light
- 12 Meters Lamp Post
- 12 Meters Pole
- 1200w Led Projector
- 15 Light Pole
- 1500w Led Projector
- 150W LED Tunnel Light
- 1800w Led Projector
- 2 In 1 Solar Flood Light
- 200w Led Tunnel Light
- 50w Led Tunnel Light
- 6 Meters Lamp Post
- 6 Meters Pole
- 8 Meters Lamp Post
- 8 Meters Pole
- 800w Led Projector
- 80w Led Tunnel Light
- Colourful Decorative Light
- Conical post
- Courtyard Lamp
- courtyard light
- courtyard lighting fixture
- Decorative Landscape Light
- Decorative road Light
- Flood Light For Courtyard
- Flood Light for Garden
- Flood Light For Outdoor
- Foot Led High Bay Lights
- high bay led lights 100w
- industrial lampshade
- industrial LED shed lights
- industrial magnifying glass with light
- Integrated Solar Flood Light
- led courtyard lamp
- led courtyard light
- led high bay light 100w
- LED Projector For Stadium
- Led UFO High Bay 150W 5000k
- Lighting Plants Mining Price
- Maintenance Free LED Street Light
- Pic Controlling Tunnel Light
- PLC controlling tunnel light
- Post Top Garden Light
- RGB Landscape Light
- Rgbw Decorative Light
- Smart Tunnel Light
- solar courtyard lamp
- solar courtyard light
- Solar LED Road Light
- Solar Street Light For 10 Meter Pole
- Solar Street Light For 12 Meter Pole
- Solar Street Light For 6 Meter Pole
- Solar Street Light For 8 Meter Pole
- Split Type Solar Flood Light
- Sporting Projector
- Stadium Led Projector
- Street Lighting Post
